Revision History
This guide will be revised whenever a new feature is released. Keep the latest version bookmarked.
| Version | Date | Author | Summary |
|---|---|---|---|
| 1.0 | 10 April 2026 | System Team | Initial release. Covers defect form lifecycle, project & unit maintenance, master data, AI analysis and reports. |
| 0.9 | 01 April 2026 | System Team | Internal draft. Added screenshots from production-like demo dataset. |
System Overview
The HOS Property Defect Management System is an end-to-end platform used by the handover team to record, track and close property defects from the moment a unit is handed over to the owner until every defect is rectified. The system covers project master data, unit lists, key deposit records, defect forms, AI-assisted defect analysis, e-Letter generation and status reporting.
Core Features
- Defect Forms — create, edit, view and close defect forms with attachments and signatures.
- Projects & Blocks — maintain project master data, including block/unit structure and defect location/category mappings.
- Units & Handover — manage unit information, handover dates, key deposits and handling officers.
- AI Defect Analysis — upload a defect photo and the system suggests defect type, severity and recommended action (powered by Kimi-K2.5).
- e-Letter Generation — generate, edit and download owner-facing letters directly from a defect form.
- Reports — export OSR, status and defect reports in Excel format.
- Master Data — maintain defect locations, categories, items and user accounts.
- Demo Data Restore — a one-click button that reseeds the database for a clean demo.
Architecture at a Glance
| Frontend | Next.js 16 (App Router) — the web UI you interact with in the browser. |
|---|---|
| Backend API | .NET 8 Web API — business logic, authorization and data access. |
| AI Service | Python FastAPI microservice that calls Microsoft Azure AI Foundry (Kimi-K2.5). |
| Database | SQL Server (local / on-prem) or MySQL (Railway cloud deployment). |
| Cache | Redis — session & short-lived cache. |
User Roles
- Admin Full access to all modules including master data and user management.
- Officer Creates and edits defect forms, manages assigned units.
- Visitor Read-only access to units and defect forms; can download attachments.
Getting Started
Accessing the System
- Open your browser (Chrome or Edge recommended) and navigate to the URL provided by your system administrator. For the cloud deployment this is a
*.up.railway.appaddress; for the on-prem deployment it is an internal URL. - The landing page is the Defect Form list, which gives you an immediate overview of all records for the projects you have access to.
- Use the top navigation bar to move between Projects, Units and Settings.
Screen Layout
Every page follows the same layout so you always know where to find things:
- Page header — product name and top-level navigation.
- Page title & description — tells you which module you are in.
- Action bar (top-right) — contains the primary button for the page (e.g. New Record, New Project).
- Filter / search card — narrow down the list by keyword, project, status or date.
- Data table — paginated list of records. Click a row action to drill into the detail page.
Defect Forms
Defect forms are the central record of this system. A single defect form belongs to one unit and can contain many individual defect items, each with its own location, category, description and photos.
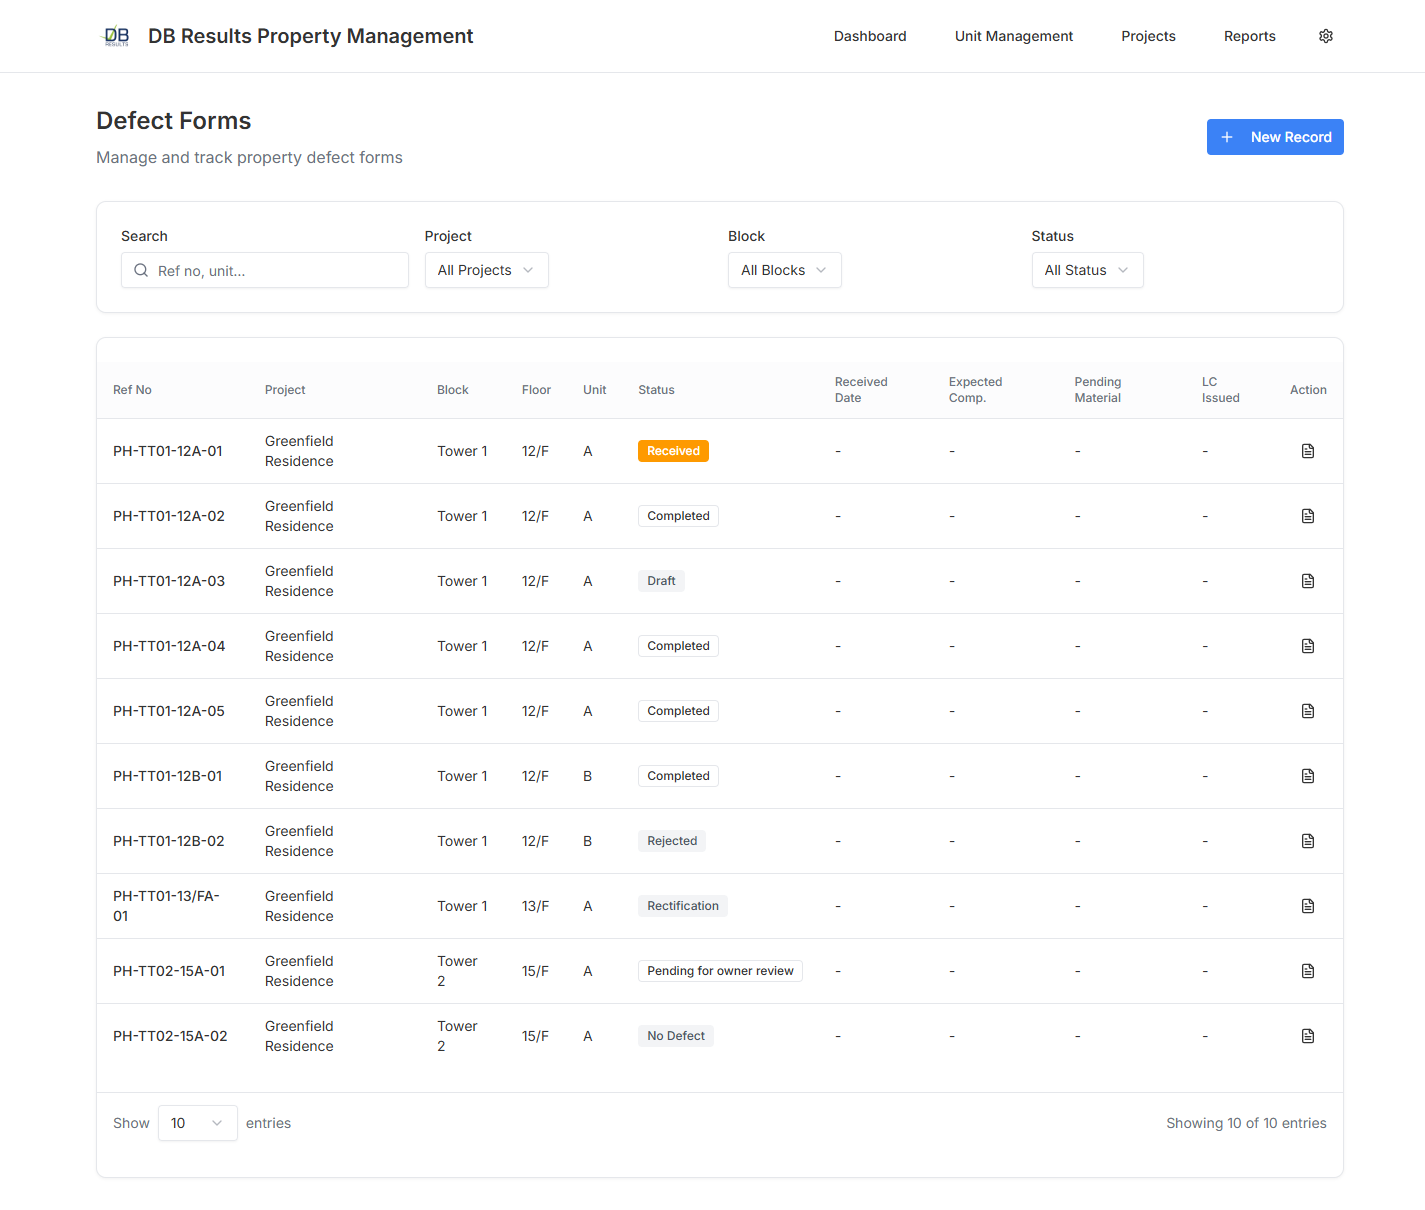
View the Defect Form List
- Click the Home icon (or the product name) in the header to return to the defect form list at any time.
- Use the filters at the top of the list to narrow results by project, status, received date or keyword.
- Each row shows the defect form number, unit reference, received date, current status and a quick action button. Click View Details to drill in.
- Status legend: Pending In Progress Closed Rejected
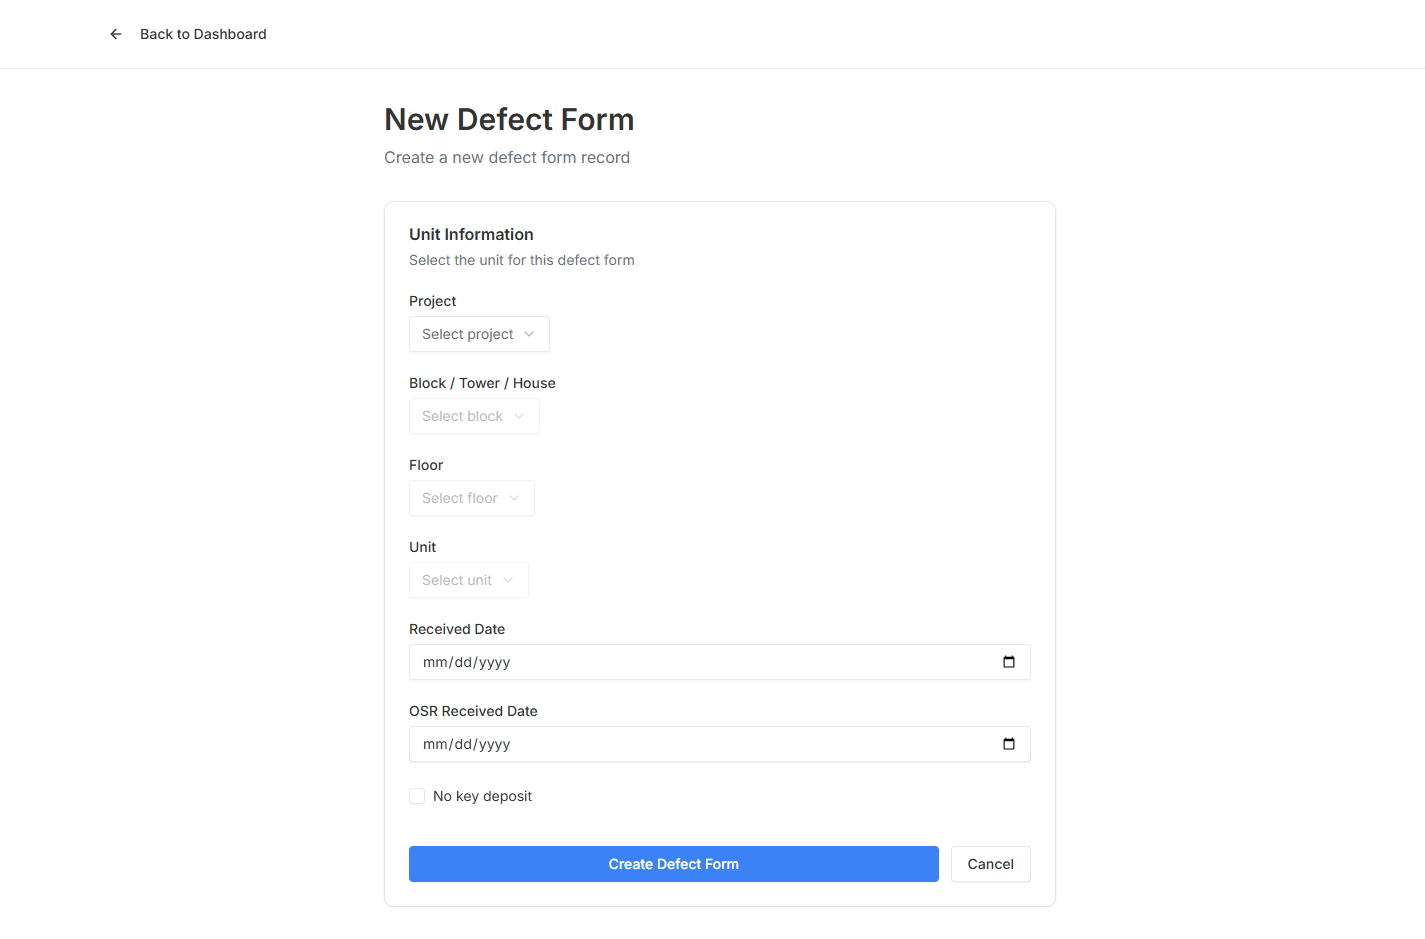
Create a New Defect Form
- From the home page click the New Record button (top-right). The new-defect-form wizard opens.
- Select the Project, Block and Unit. The system filters blocks and units based on your project selection so you cannot pick an invalid combination.
- Enter the Received date — by default the current date and project cut-off time are pre-filled.
- Add at least one defect item: pick a location (e.g. Master Bedroom), a category (e.g. Finishing) and a specific item. Add a short description and attach one or more photos.
- Optionally click AI Analyze on a photo to let the system suggest a defect type and severity. See AI Defect Analysis for details.
- Click Save Draft to keep editing later, or Submit to push the form to Pending status.
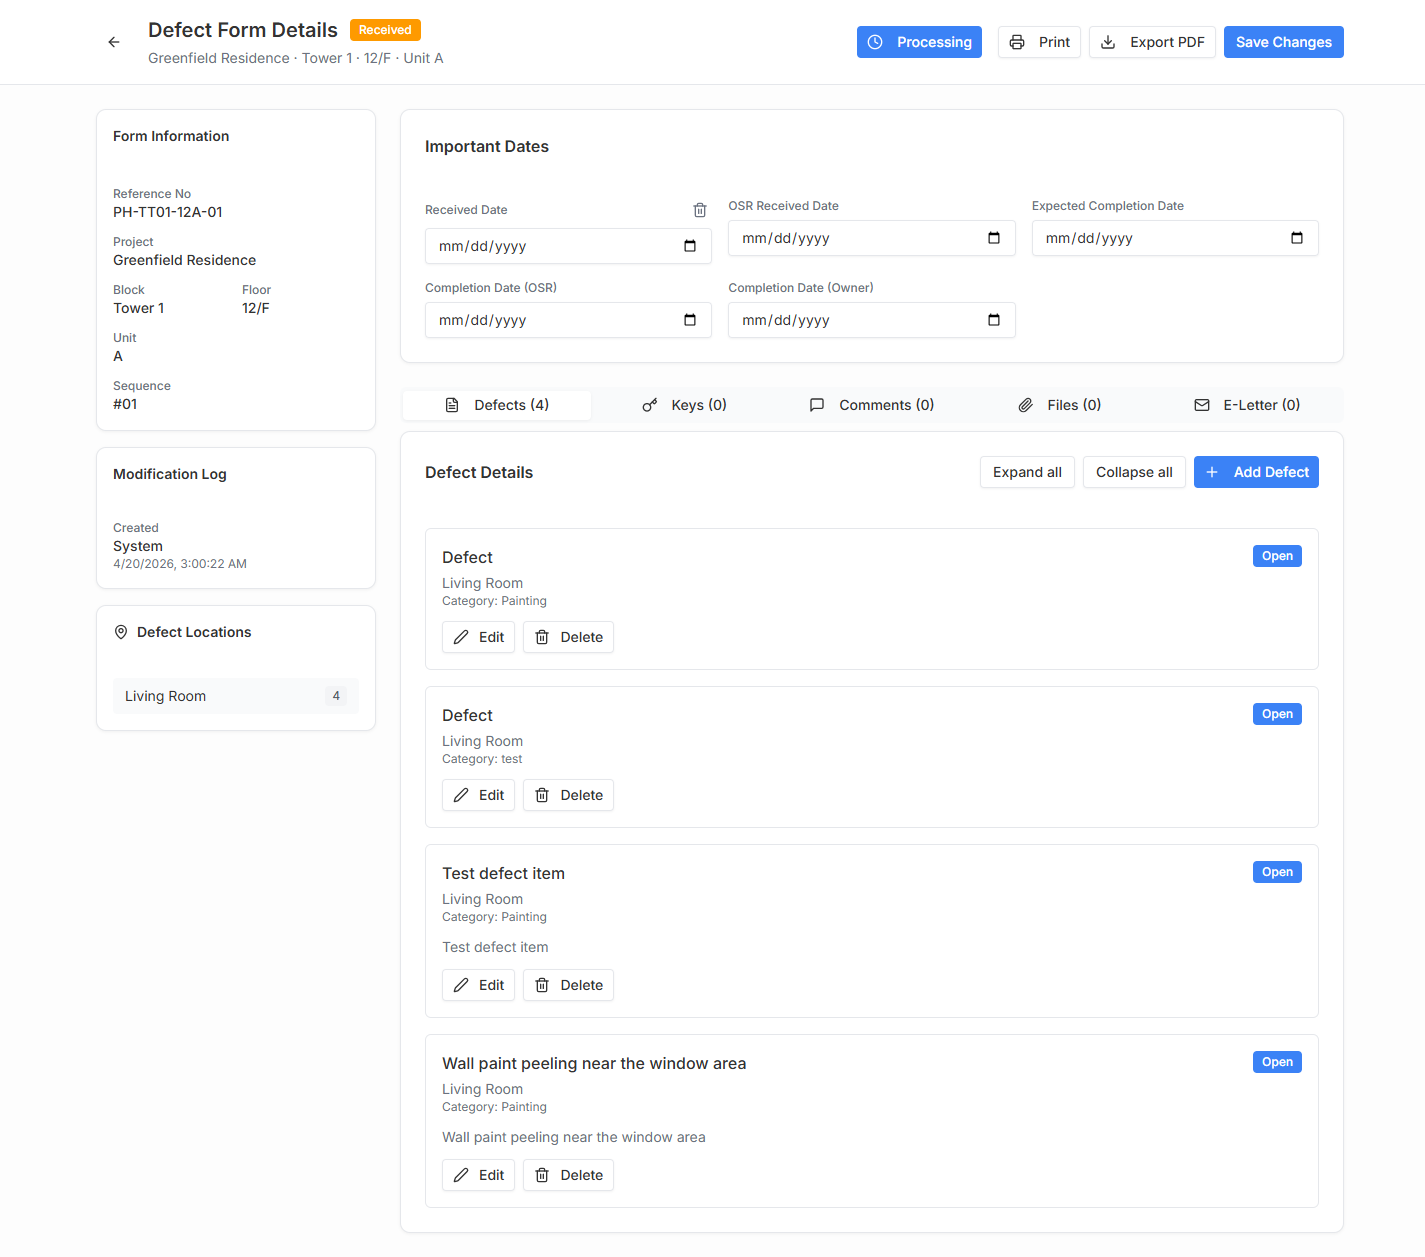
Open & Edit a Defect Form
- From the defect form list, click View Details on the row you want to open.
- The detail page is organised into three tabs:
- Form Info — unit, dates, status and officer assignment.
- Defect Items — expandable list of every defect captured on the form, with photos and comments.
- e-Letters — generate, preview and download owner-facing letters (e.g. Letter C(I), Letter C(II)).
- Use Expand All / Collapse All to quickly scan or hide defect details.
- To change status click the Status dropdown. The system automatically updates the status date and logs the change in the audit trail.
- To close a defect form, set every defect item to Resolved, then click Close Form. A confirmation dialog will appear.
Projects
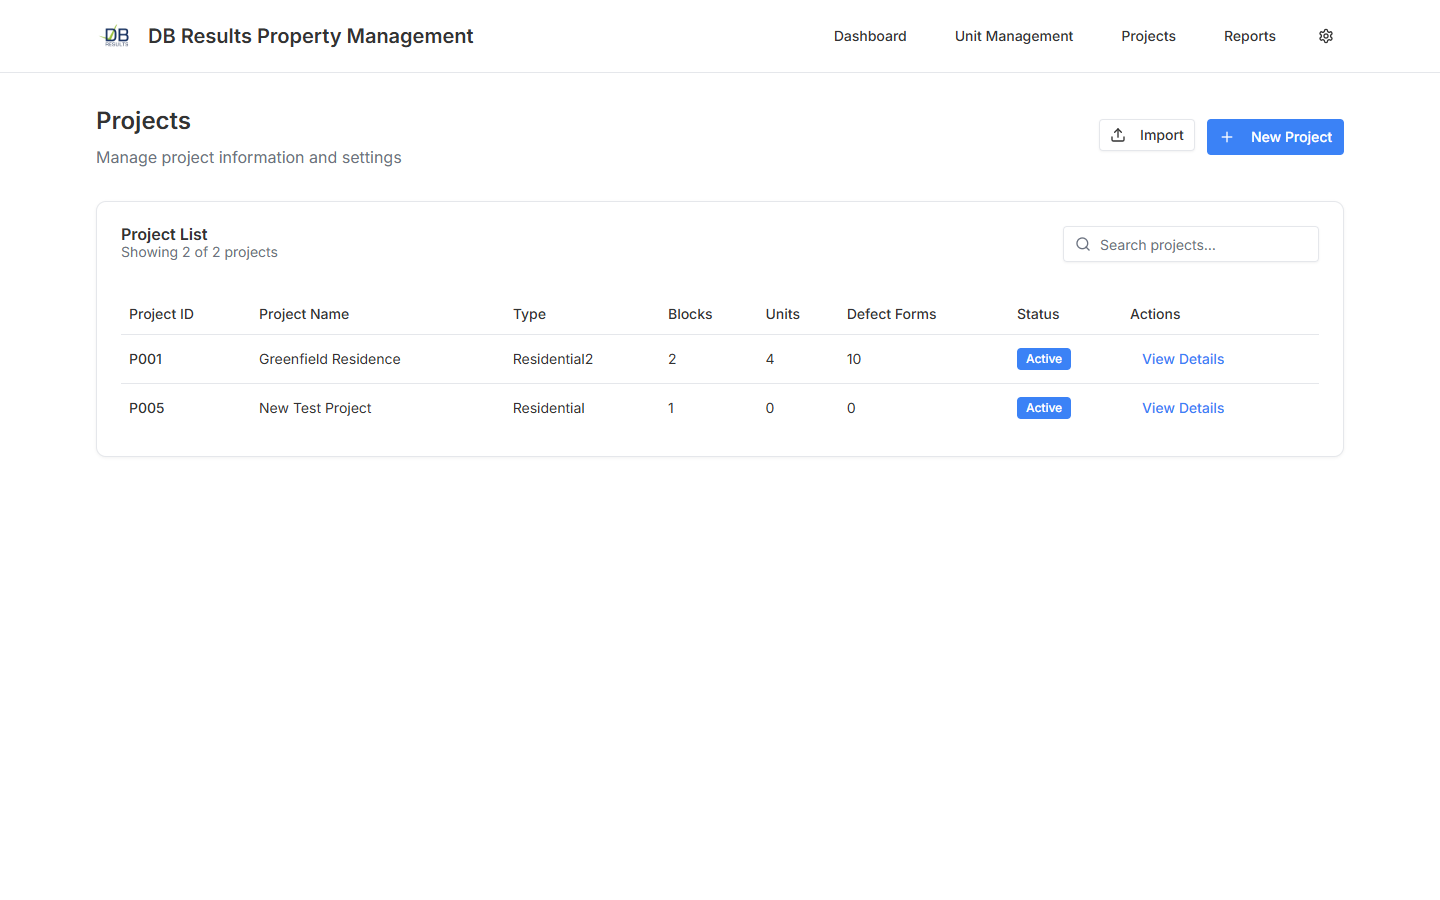
Browse Projects
- Click Projects in the top navigation bar.
- You will see a paginated list of every project. Columns include the project code, English name, type, block count, unit count, defect form count and active status.
- Use the search box (top-right of the card) to filter by project code or name.
- Click View Details on any row to jump to the project detail page.
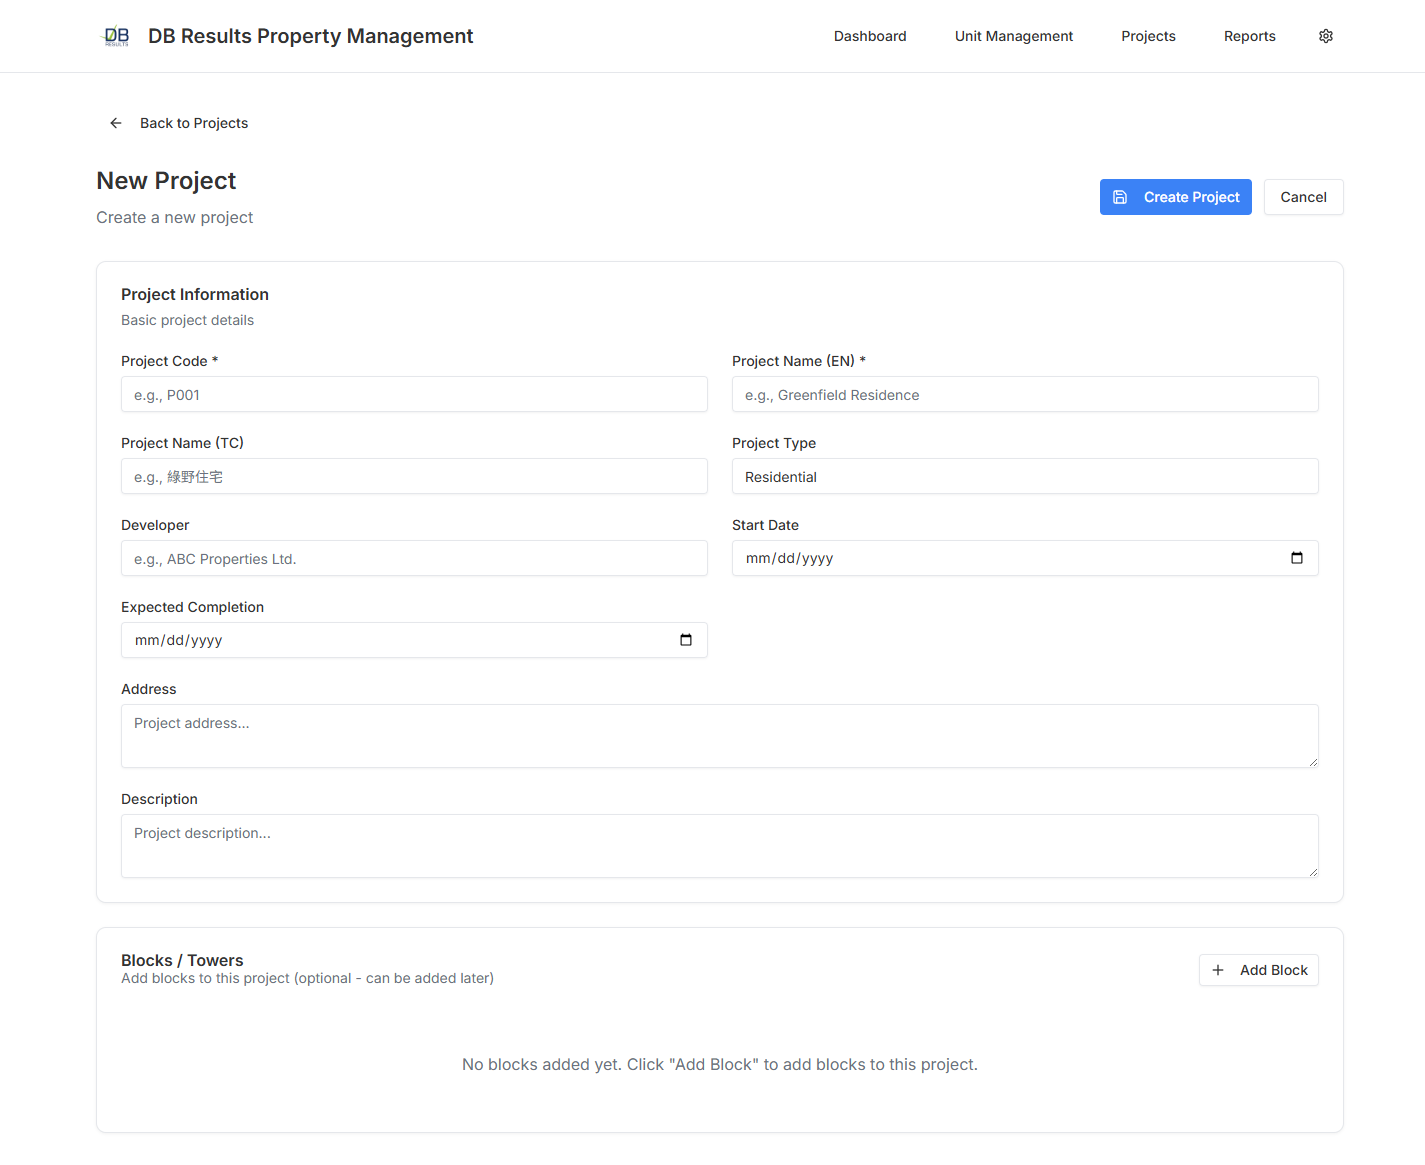
Create a New Project
- From the projects list click New Project (top-right).
- Enter the mandatory fields:
- Project Code — must be unique (e.g.
P006). - Name (English) — appears on every printed document.
- Name (Traditional Chinese) — optional, used on Chinese-language outputs.
- Project Type — Residential, Commercial or Mixed.
- Cut-off Time — controls how the received date of a defect form is calculated.
- Phone number — used inside e-Letter templates.
- Project Code — must be unique (e.g.
- Click Save. You will be redirected to the new project's detail page where you can set up blocks, units and defect location/category mappings.
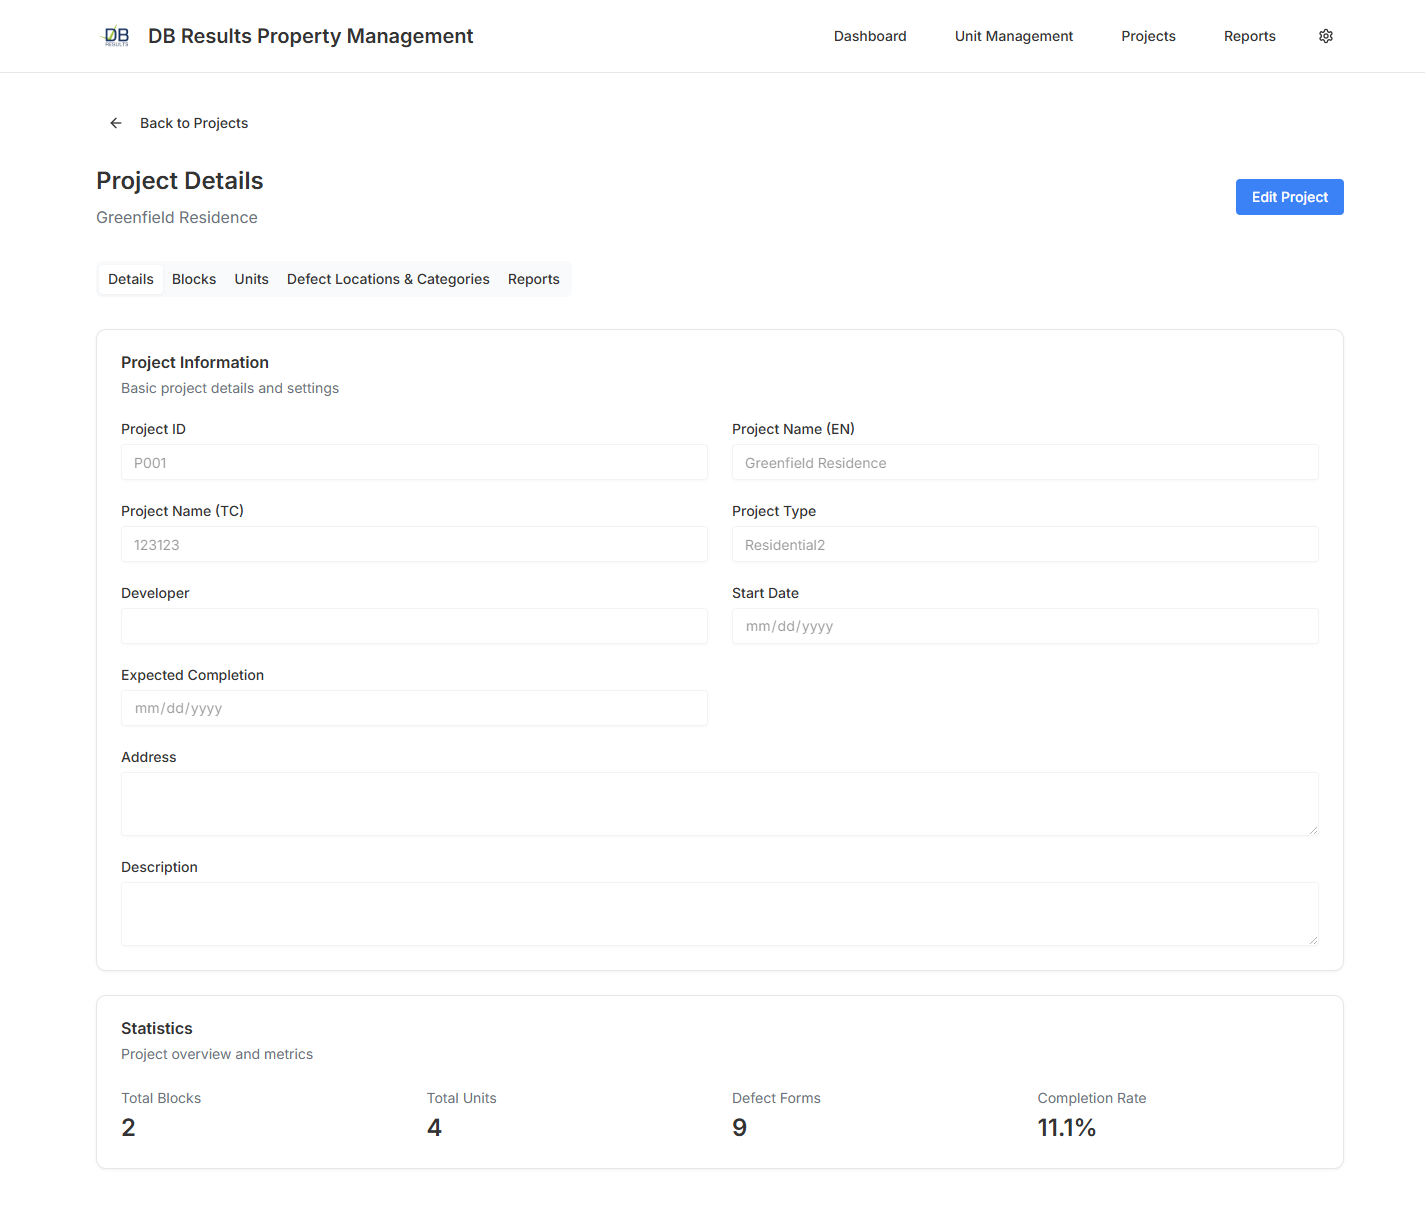
Project Detail & Maintenance
The project detail page has multiple tabs:
- Overview — summary statistics (blocks, units, defect forms) and quick links.
- Blocks — add, edit or import blocks. Each block belongs to one project.
- Units — manage units per block; supports bulk import.
- Defect Locations / Categories — map global master-data locations and categories to this project only (feature request CR-[Change] mapping defect location & category on project maintenance page).
- Encryption Key — Admin only. Rotate the project-based encryption key used to protect PII.
Units & Handover
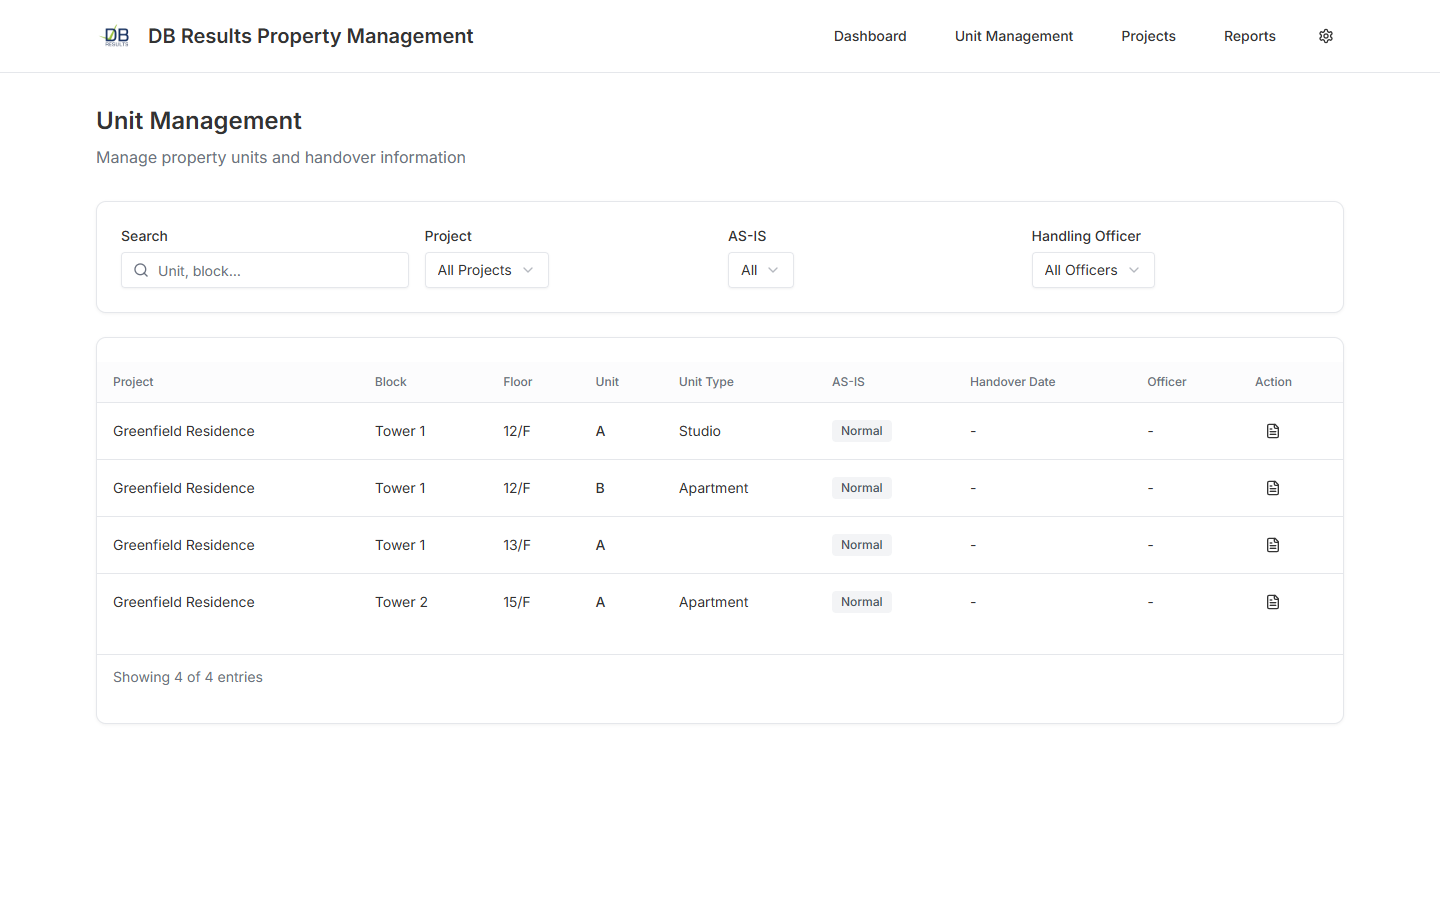
Unit List & Filters
- Click Units in the top navigation bar.
- The page opens with four filter controls: Search, Project, AS-IS and Handling Officer.
- The table below lists every unit matching the filters, with project, block, floor, unit number, unit type, AS-IS flag, handover date and assigned officer.
- Use the pagination controls at the bottom right to navigate long lists.
- Click the document icon on any row to open the unit detail page.
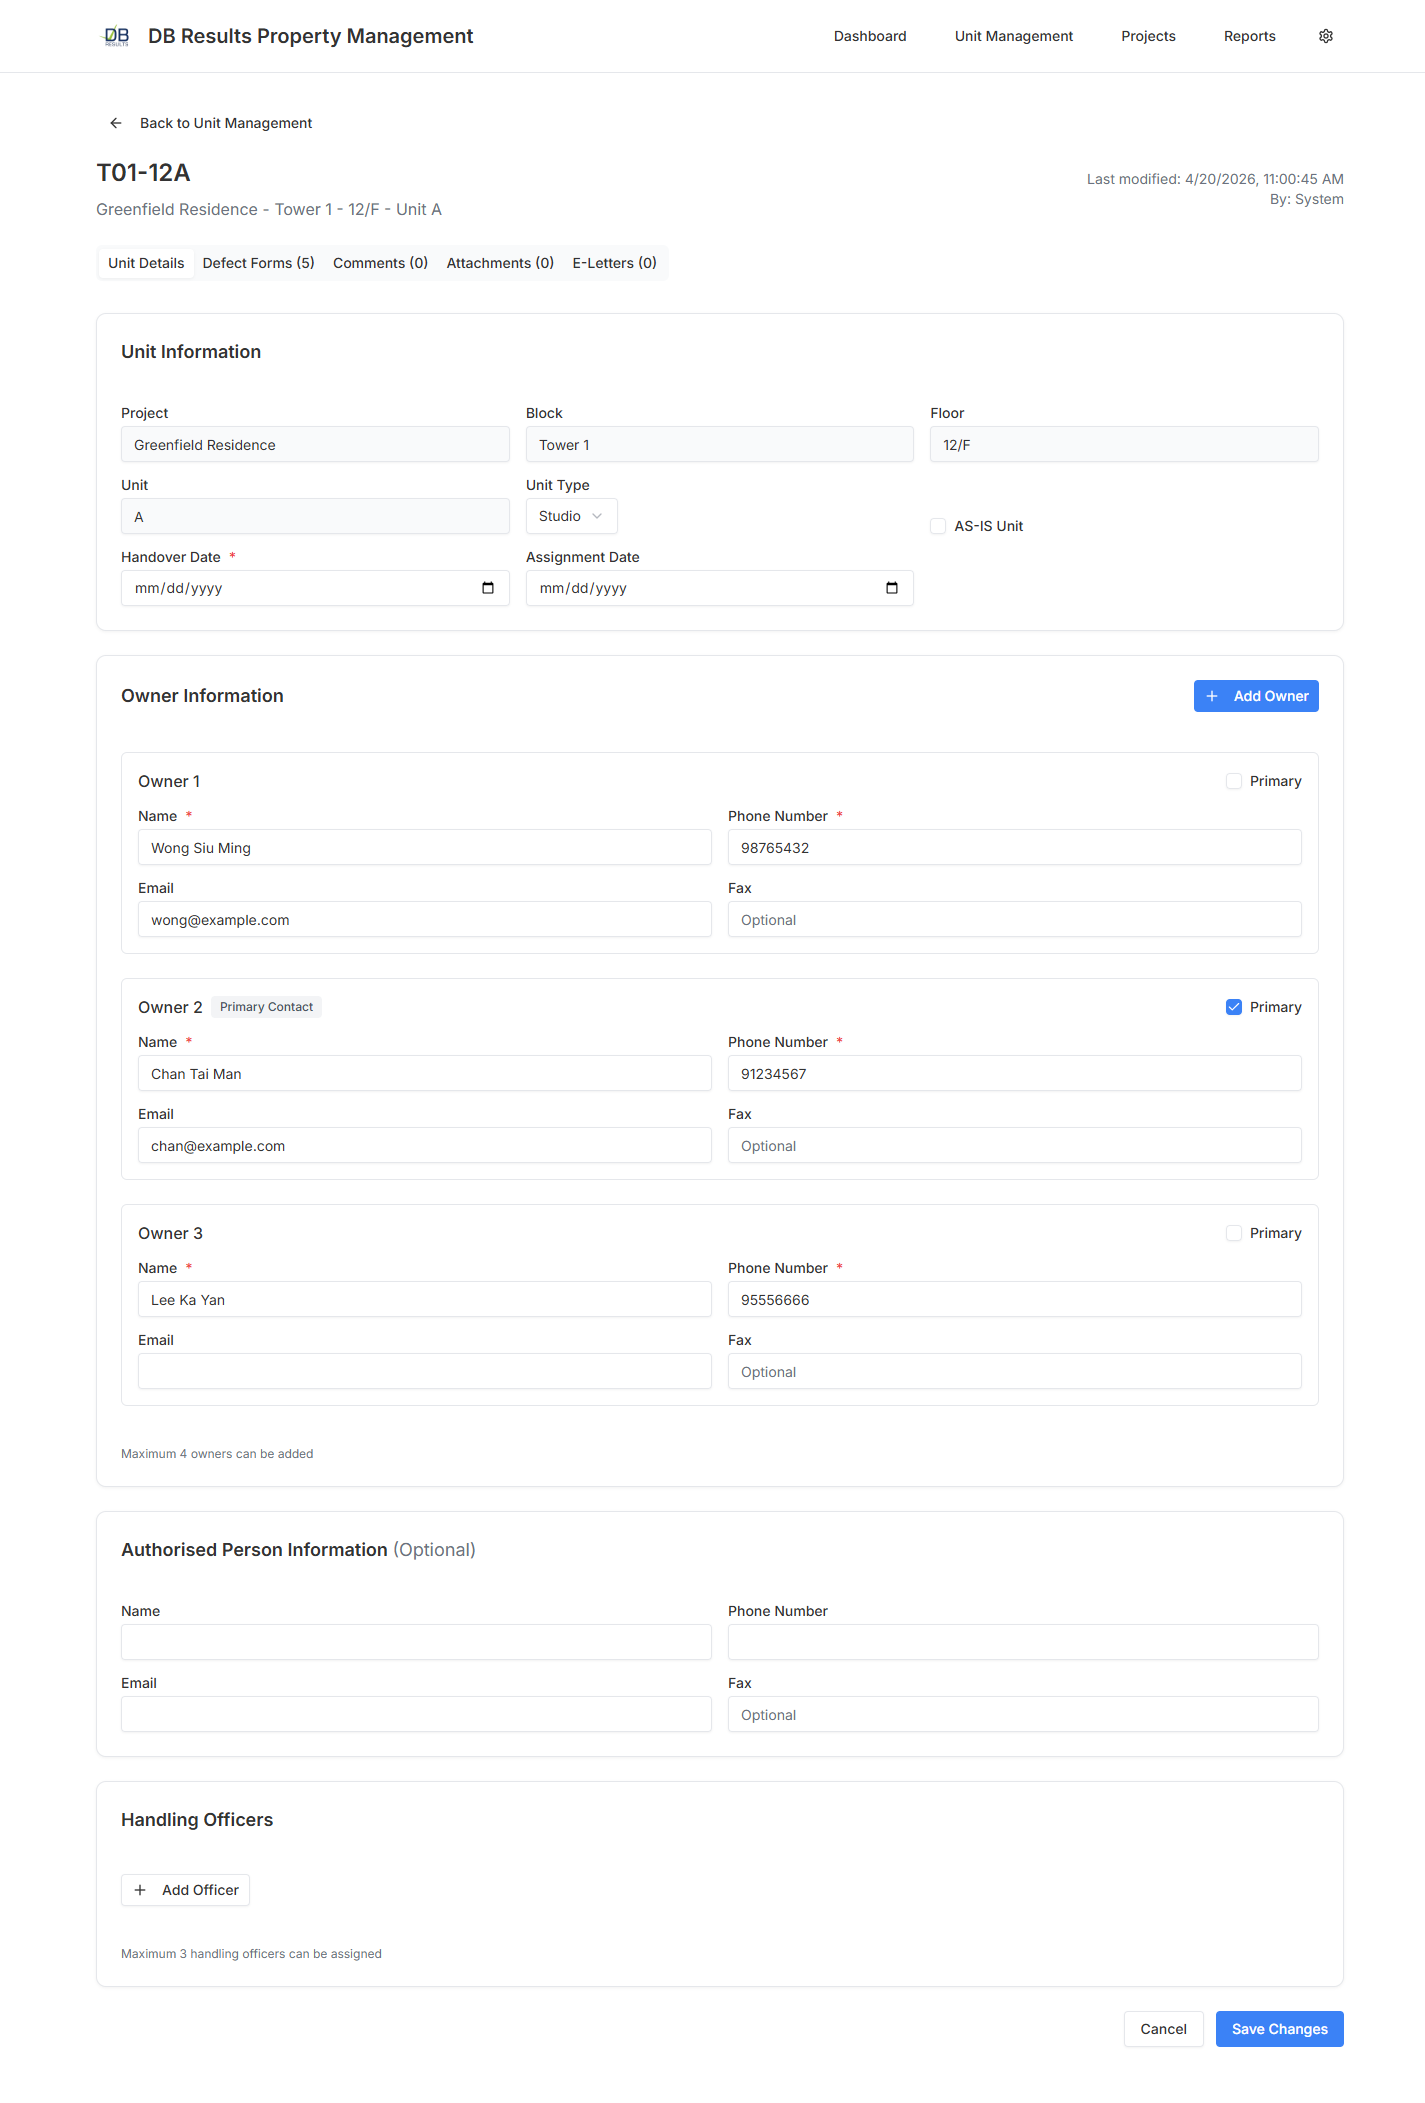
Unit Detail & Handover Record
The unit detail page consolidates everything about a single unit:
- Unit Info — block, floor, unit number, unit type and AS-IS flag.
- Owner Information — primary contact, authorised persons, phone numbers (fields marked as PII are encrypted at rest).
- Handover — handover date, officer names and handover attachments.
- Key Deposit — record of key types, quantities, deposit timestamps and remarks. Admin can edit or delete rows.
- Defect Forms — quick link to every defect form captured on this unit.
- Comments & Attachments — free-text notes and file uploads (scanned check-good forms, surveys from SINO Living, etc.).
Master Data & Settings
The Settings page is where administrators maintain the reference data that the rest of the system depends on. You can reach it from the Settings link in the top navigation.
General Settings & Demo Restore
- Open Settings → General.
- From here you can change display preferences and — very importantly for demo environments — click Restore Demo Data.
- The restore button clears every transactional table and re-seeds the database with a known set of 66 demo records (2 projects, 3 blocks, 4 units, 10 defect forms, master data, users). This guarantees the same baseline data for every demonstration.
- A confirmation dialog will appear. Click Confirm to proceed. The page auto-refreshes once the restore completes.

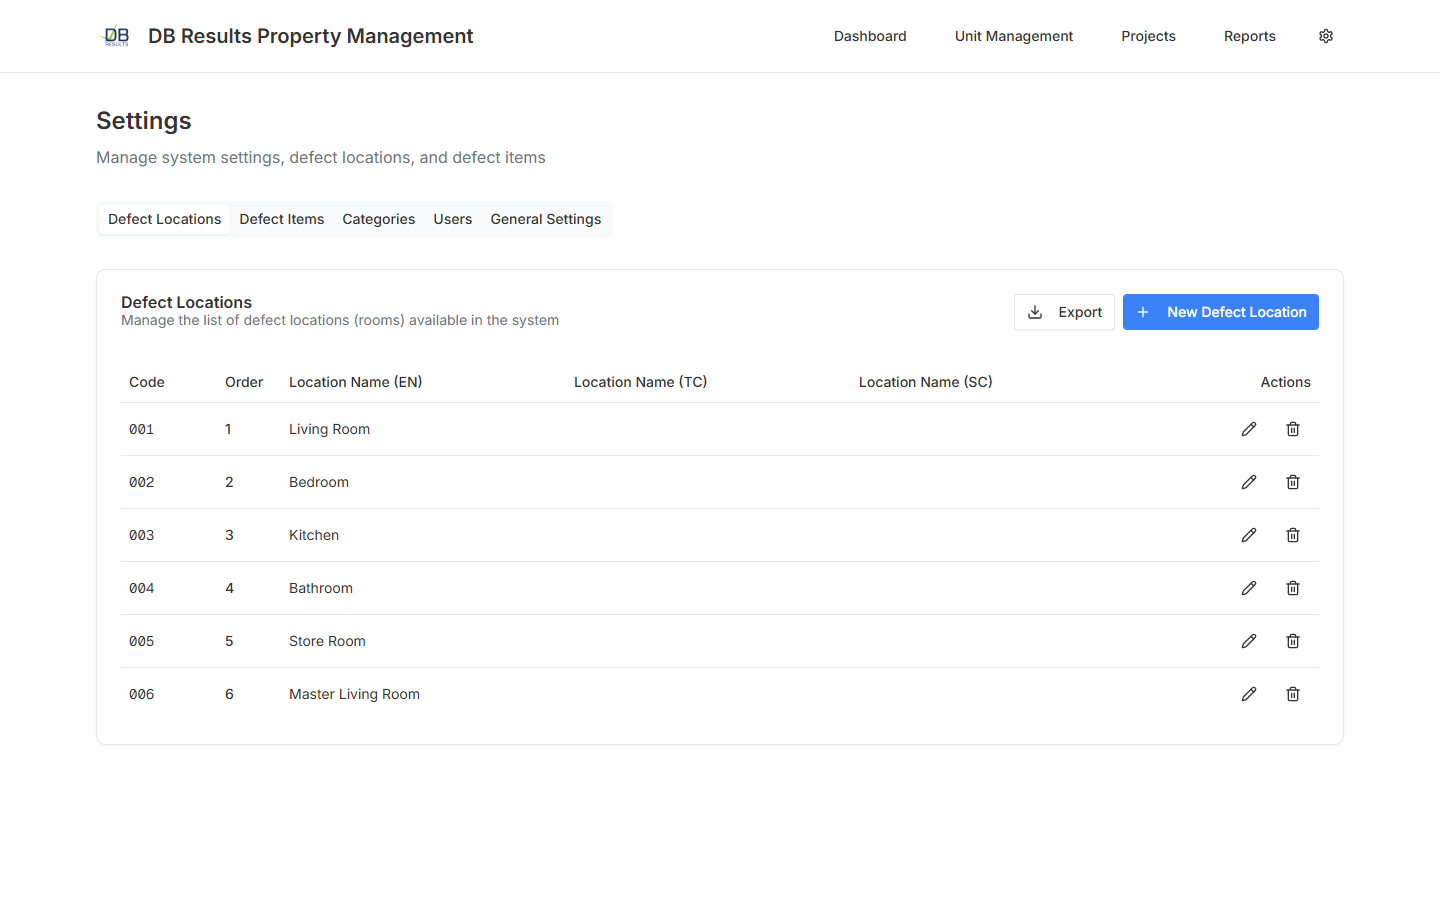
Defect Locations
- Open the Defect Locations tab.
- Click Add Location to create a new master location (English, Traditional Chinese and Simplified Chinese names, plus a display order).
- Existing rows can be edited (pencil icon) or deleted (trash icon). System-created rows are protected from deletion.
- Use the Export button to download the entire master list in Excel format; use Import to bulk-load locations from a spreadsheet.
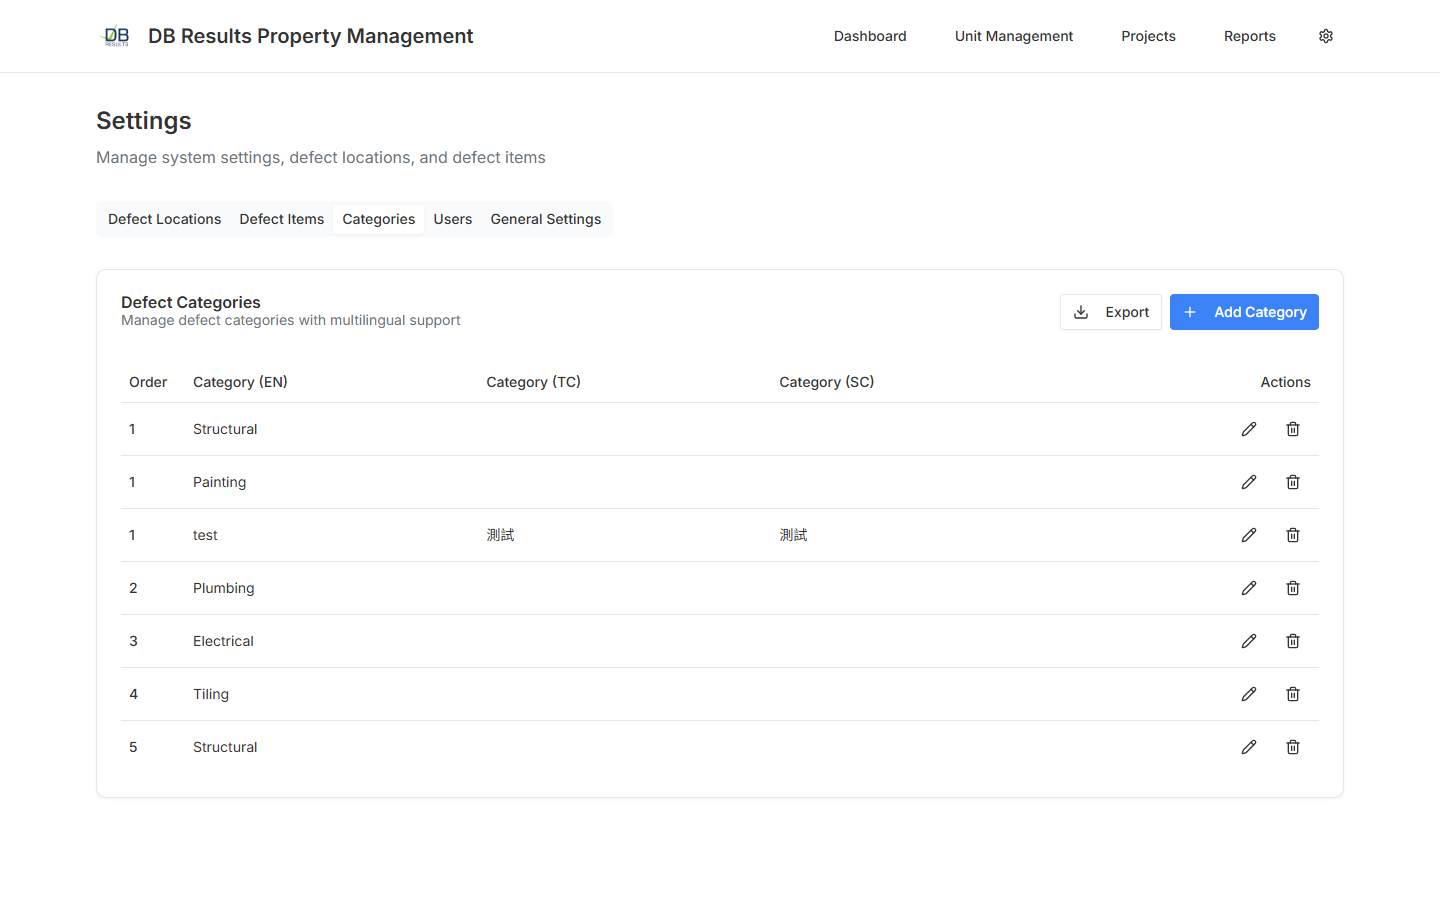
Defect Categories
Categories group defect items into functional buckets (Finishing, Structural, M&E / Plumbing, Electrical, HVAC). Use the same add / edit / delete / import / export workflow as defect locations.
Defect Items
Each defect item belongs to a single category and can be mapped to multiple locations. For example the item Wall paint peeling (Finishing) applies to every room location.
- Click Add Defect Item.
- Select the parent Category, enter the multilingual name and pick one or more Locations where this item is usually observed.
- Set the Display Order to control the order shown in the defect-form wizard.
- Click Save.

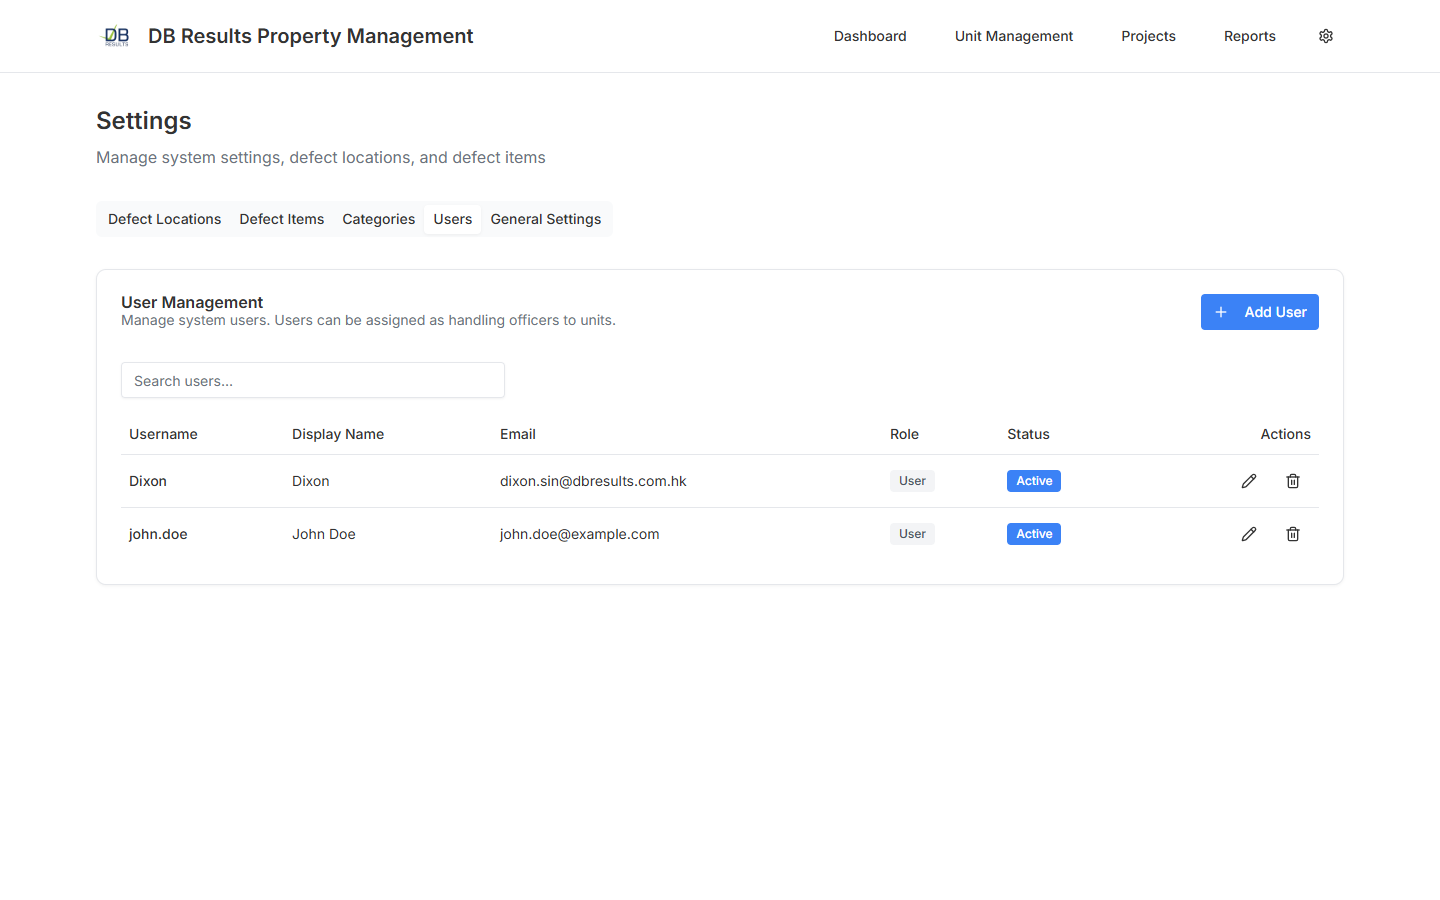
Users & Roles
- Open the Users tab.
- Click Add User, enter the username, email, display name, password and assign a Role (Admin, Officer or Visitor).
- Optionally tick Requires two-factor authentication to enforce 2FA on next login.
- Use the pencil icon to edit a user or toggle the Active switch to disable an account without deleting it.
AI Defect Analysis
The system is integrated with Microsoft Azure AI Foundry using the Kimi-K2.5 model. When you upload a defect photo the AI service suggests the most likely defect type, severity, a short description and a recommended action.
- Open (or start) a defect form.
- In a defect item, upload a photo using the Attach Photo button.
- Click AI Analyze next to the uploaded photo.
- Within a few seconds the system returns:
- Detected — whether a defect was recognised.
- Defect Type — e.g. Wall paint peeling.
- Severity — Low / Medium / High.
- Confidence — a probability between 0 and 1.
- Description — a natural language summary.
- Recommended Action — suggested repair steps.
- Location & Category Suggestion — best-match master data entry so you can accept with one click.
- Click Apply Suggestion to accept, or edit the fields manually if you disagree.
Reports & Exports
Reports are available from the Reports tab on the project detail page.
- OSR Report — outstanding defect summary by block / unit / category. Exported in Excel format. The counting logic respects the project's cut-off time.
- Status Report — overall progress including sections for handover, pending material, LC issued and outstanding defects.
- Defect Details Export — full row-level export including every defect item, photo reference and current status.
- Masked Defect Form — PDF version of a defect form with PII redacted — useful for contractor-facing copies.
Troubleshooting
| Symptom | Likely cause & remedy |
|---|---|
| "No projects found" on the dashboard |
The browser could not reach the backend API. Confirm with your administrator that the environment variable
NEXT_PUBLIC_API_URL points to the correct backend URL. On Railway, the backend must also have
FRONTEND_URL configured for CORS.
|
| "Failed to restore demo data" |
The backend could not connect to the database or the user does not have Admin role.
Check the backend logs for "cannot open connection" messages, verify the
ConnectionStrings__DefaultConnection variable and that the database is online.
|
| AI Analyze returns "AI analysis failed" |
The Kimi-K2.5 endpoint or key is incorrect, or the model exceeded the token budget.
Confirm AI__ApiKey, AI__Endpoint and AI__Model on the AI service.
The guide's max_tokens is 8192 — reduce the prompt or upload a smaller image if the error persists.
|
| Unit list shows "Unit not found" | The unit may belong to a project you do not have access to, or the project-based encryption key was rotated. Contact your administrator to verify your project assignments and role. |
| Uploads fail with "Unrestricted file type" | The file extension is not on the allowed list (jpg, jpeg, png, pdf). Convert the file before uploading. |
| Login redirects to the login page again | Session expired. Log in again. If it happens repeatedly, clear the browser's cookies for the site and check that your device's clock is in sync (JWT tokens are time-sensitive). |
| Slow defect form list | Reduce the page size using the dropdown at the bottom of the table, apply tighter filters (project & received-date range), or ask your administrator to archive historical data. |
Where to get help
For in-system issues contact the System Team. Please include a screenshot, the URL, the approximate time and your username — these four pieces of information let us resolve most issues within one business day.